Hi, kids! I have a fun, easy Christmas craft for you—mouse ornaments! This DIY project only needs a few tools, a candy cane, and some fabric.
Making holiday ornaments is a great way to spend time with family and make your house festive. Use them to decorate tables, or hang them on a Christmas tree to spread the joy.
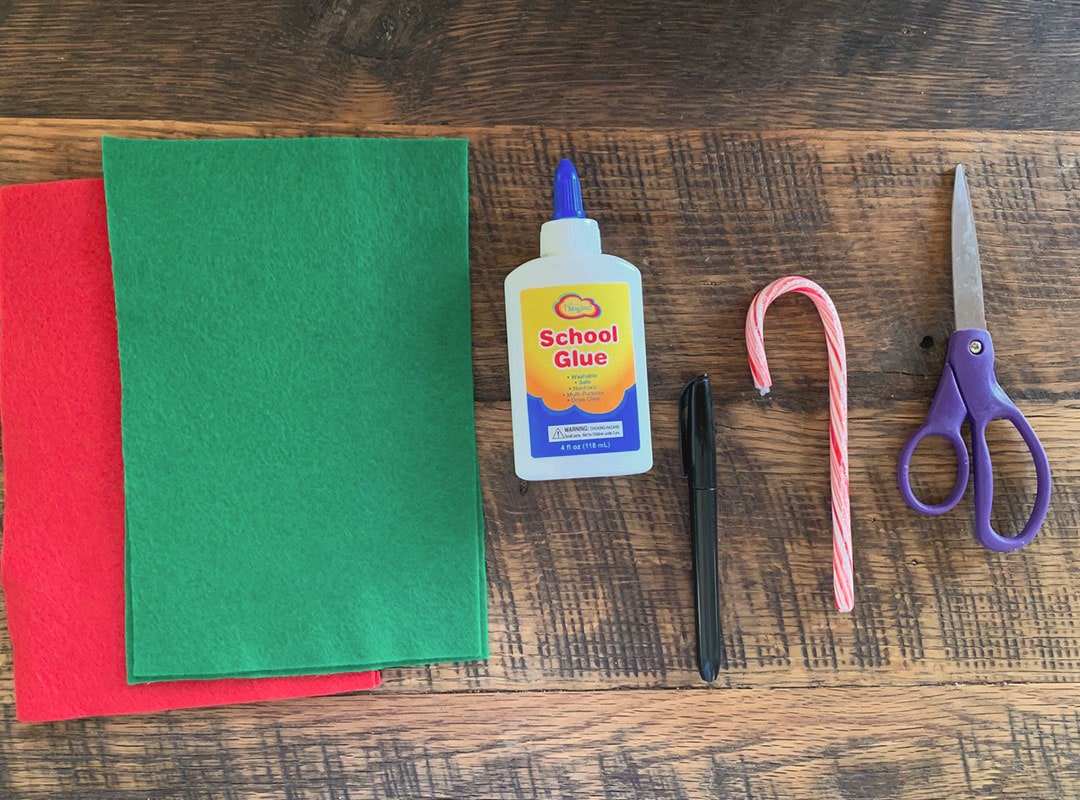
1. Ready your tools & materials
Gather some felt, a candy cane, scissors, glue, and a marker, and then print out the pattern below.
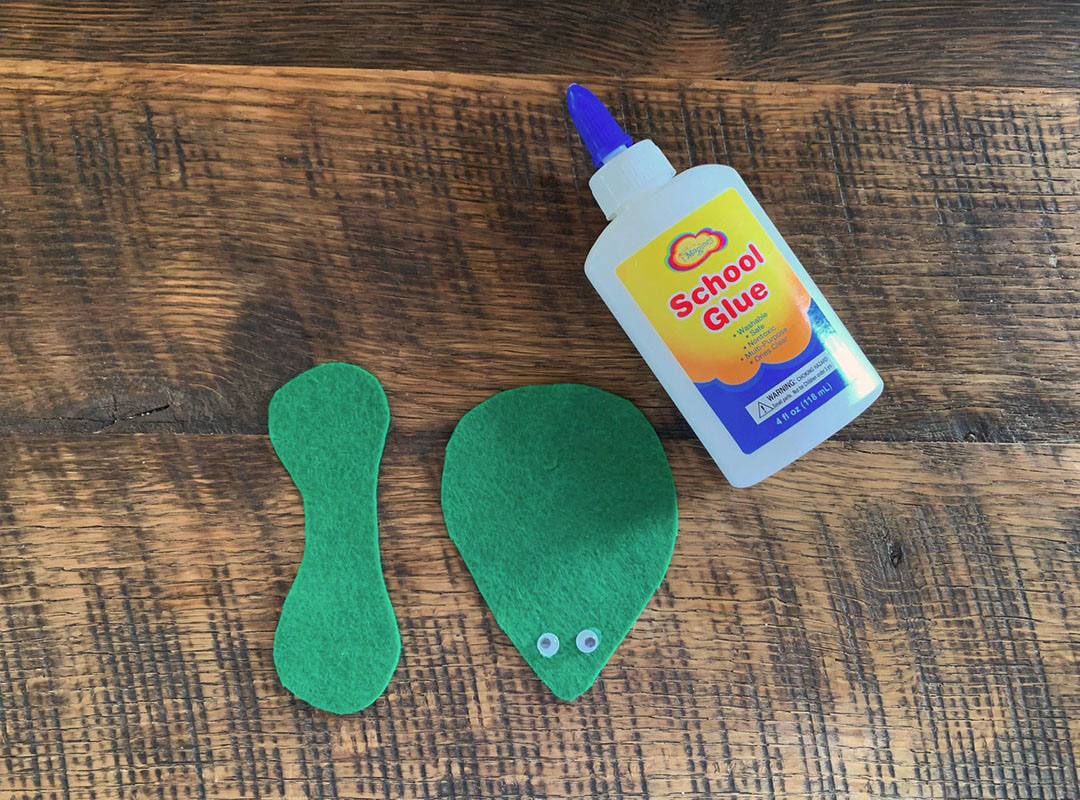
2. Cut out the shapes & glue on the eyes
Using the printed pattern, cut out the mouse’s body & ears. Use a marker to trace them onto the felt, or freehand draw them and get creative with the sizes. Cut out the 3 holes, as shown on the pattern. Flip the fabric so that the sides with marker are facing down.
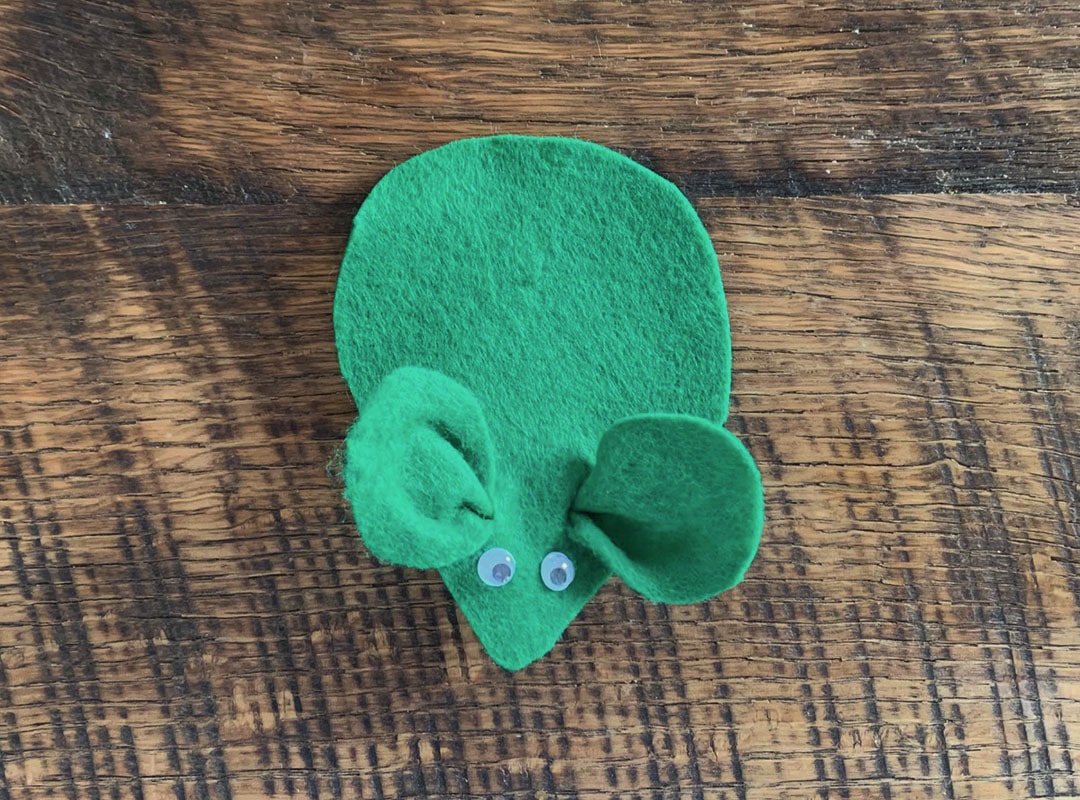
3. Attach the ears
Pull the ears down through one hole and up through the other. Adjust until they’re evenly spaced.
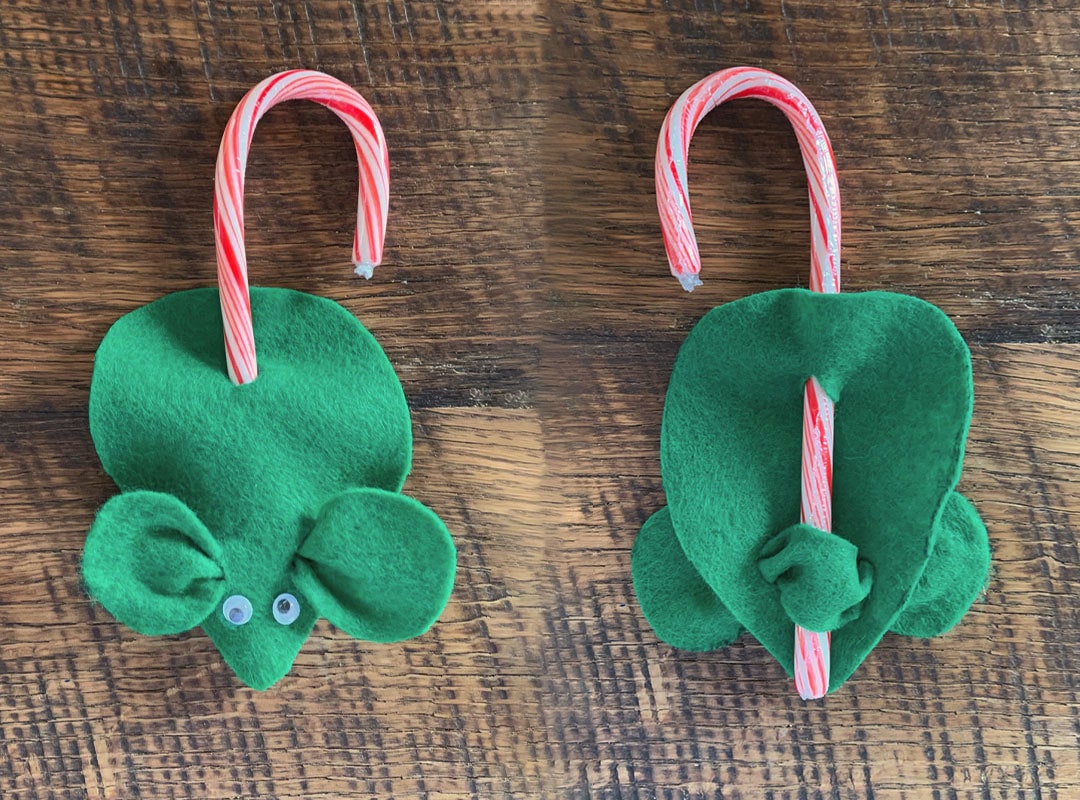
4. Add the tail
Push the long end of a candy cane down through the hole near the mouse’s rear, flip the mouse over, and secure the end of the candy cane inside the loop made by the ear fabric. Use glue if needed.
5. Add the finishing touches & hang it up
Glue or draw on any other decorations you want to add to your completed mouse. Let it dry, and hang it up!
Enjoy your holiday ornament, and share a picture with me on Facebook!


Leave A Comment